
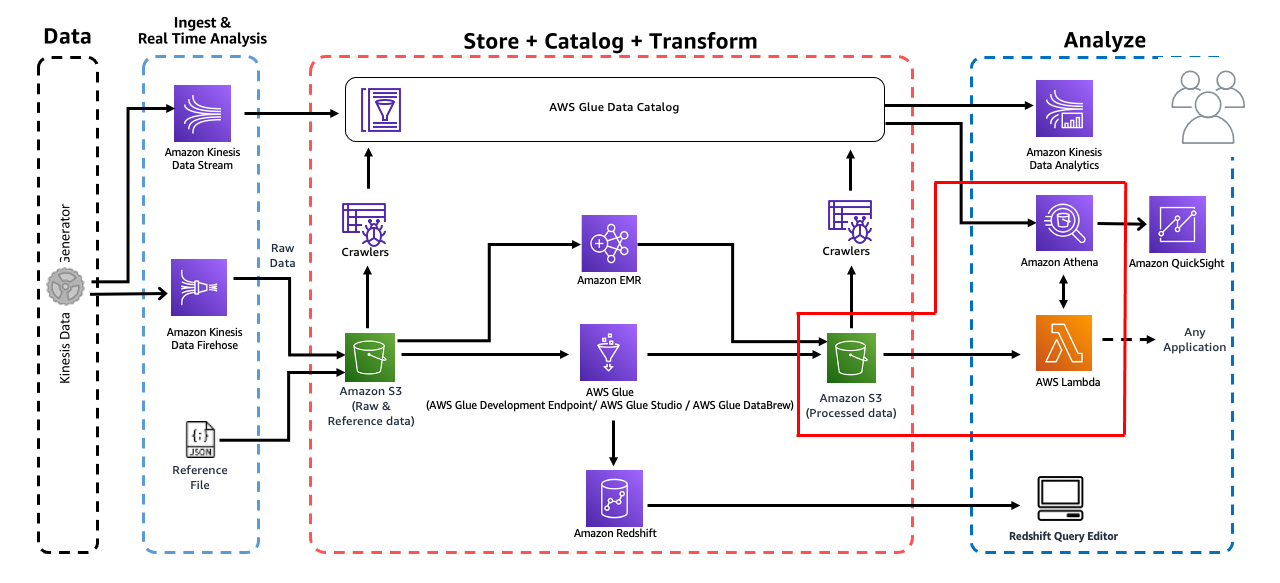
이 모듈에서는 매우 구체적인 사용 사례 예제로 Lambda 함수를 생성 할 것입니다. 우리가 작성할 람다 함수는 Athena가 S3의 processsed data에서 Hits 별 Top 5 Popular Songs를 쿼리하고 가져 오는 코드를 호스팅합니다.
1. Lambda 함수 생성
Lambda 콘솔 https://us-east-1.console.aws.amazon.com/lambda/home?region=us-east-1#/functions로 이동합니다.

리전이 버지니아 북부로 설정되어 있는지 확인하고 함수 생성을 누릅니다.
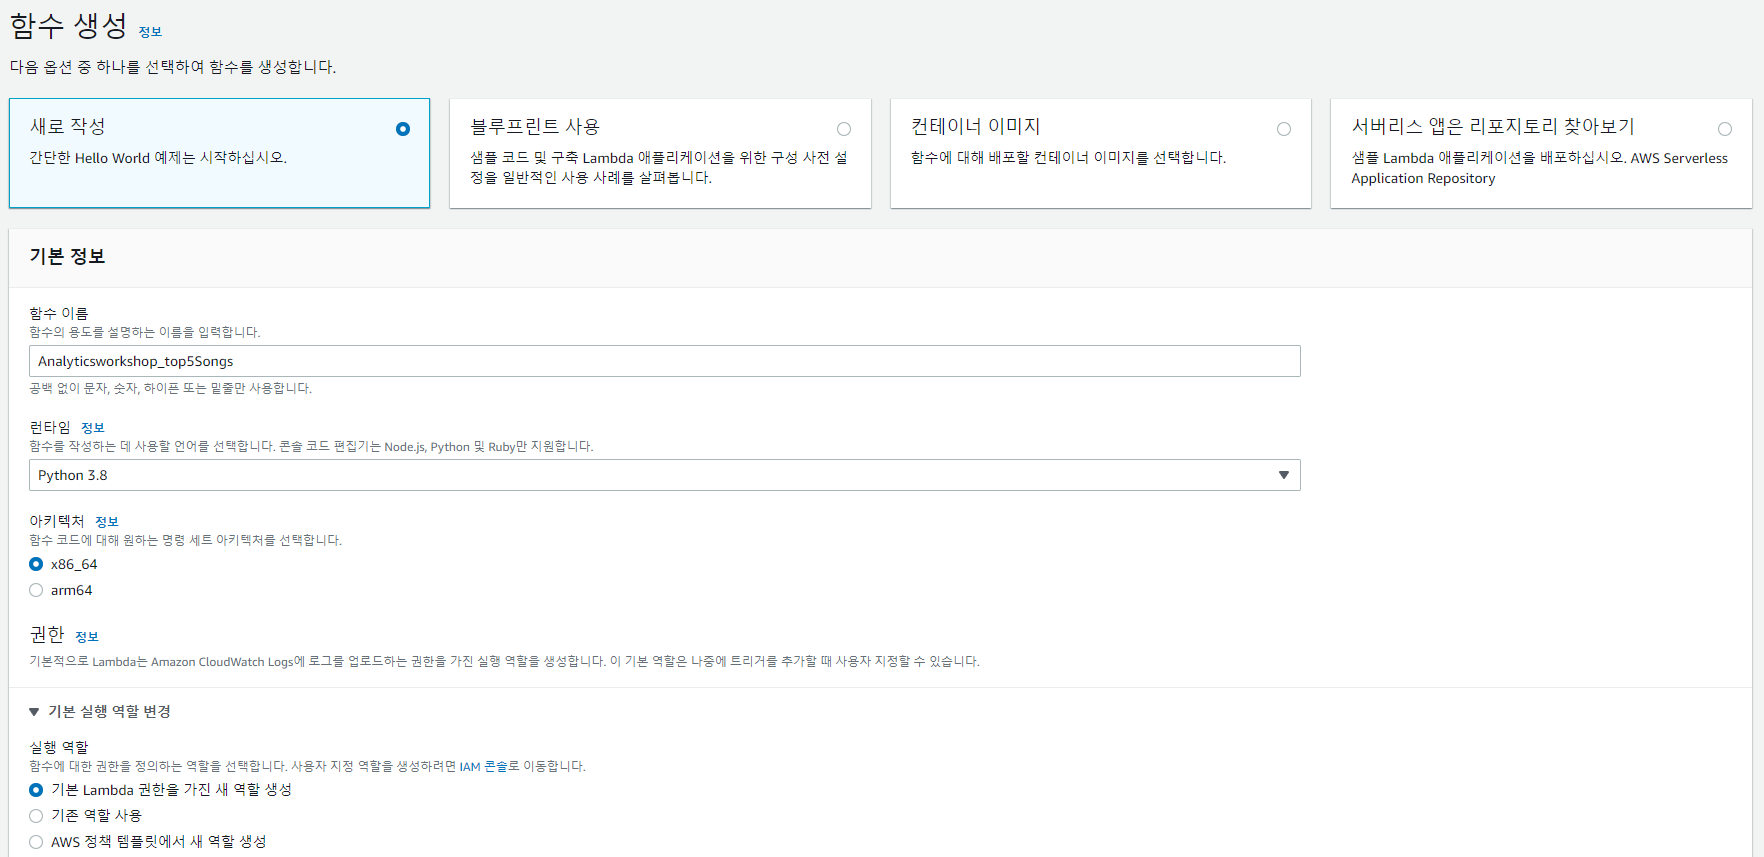
함수 이름은 Analyticsworkshop_top5Songs를 입력하고 나머지는 위와 동일하게 설정한 뒤 함수를 생성합니다.
2. Lambda 함수 작성
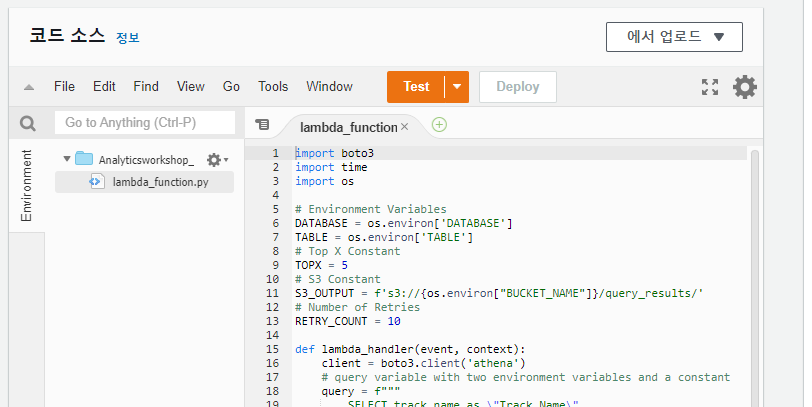
이 섹션에서는 방금 만든 람다 함수에 대한 코드를 제공합니다. boto3를 사용하여 Athena 클라이언트에 액세스합니다.
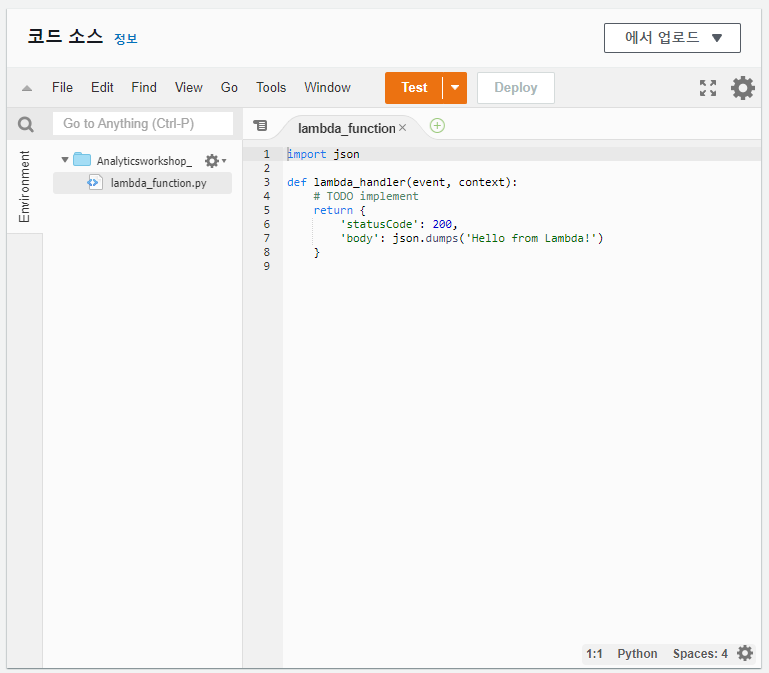
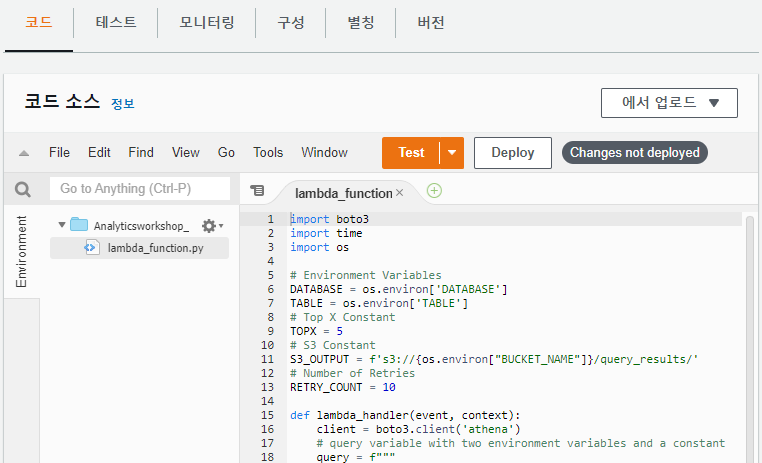
아까 만든 함수 Analyticsworkshop_top5Songs에 들어가 아래로 스크롤하면 코드 소스 란이 있습니다. 여기 적혀있는 코드를 다음과 같이 변경합니다.
1
2
3
4
5
6
7
8
9
10
11
12
13
14
15
16
17
18
19
20
21
22
23
24
25
26
27
28
29
30
31
32
33
34
35
36
37
38
39
40
41
42
43
44
45
46
47
48
49
50
51
52
53
54
55
import boto3
import time
import os

# Environment Variables
DATABASE = os.environ['DATABASE']
TABLE = os.environ['TABLE']
# Top X Constant
TOPX = 5
# S3 Constant
S3_OUTPUT = f's3://{os.environ["BUCKET_NAME"]}/query_results/'
# Number of Retries
RETRY_COUNT = 10

def lambda_handler(event, context):
    client = boto3.client('athena')
    # query variable with two environment variables and a constant
    query = f"""
        SELECT track_name as \"Track Name\",
                artist_name as \"Artist Name\",
                count(1) as \"Hits\"
        FROM {DATABASE}.{TABLE}
        GROUP BY 1,2
        ORDER BY 3 DESC
        LIMIT {TOPX};
    """
    response = client.start_query_execution(
        QueryString=query,
        QueryExecutionContext={ 'Database': DATABASE },
        ResultConfiguration={'OutputLocation': S3_OUTPUT}
    )
    query_execution_id = response['QueryExecutionId']
    # Get Execution Status
    for i in range(0, RETRY_COUNT):
        # Get Query Execution
        query_status = client.get_query_execution(
            QueryExecutionId=query_execution_id
        )
        exec_status = query_status['QueryExecution']['Status']['State']
        if exec_status == 'SUCCEEDED':
            print(f'Status: {exec_status}')
            break
        elif exec_status == 'FAILED':
            raise Exception(f'STATUS: {exec_status}')
        else:
            print(f'STATUS: {exec_status}')
            time.sleep(i)
    else:
        client.stop_query_execution(QueryExecutionId=query_execution_id)
        raise Exception('TIME OVER')
    # Get Query Results
    result = client.get_query_results(QueryExecutionId=query_execution_id)
    print(result['ResultSet']['Rows'])
    # Function can return results to your application or service
    # return result['ResultSet']['Rows']
3. Environment Variables
위에서 코드를 작성해 변경한 내용을 환경 변수의 변경하는 것만으로도 동일하게 적용할 수 있습니다.
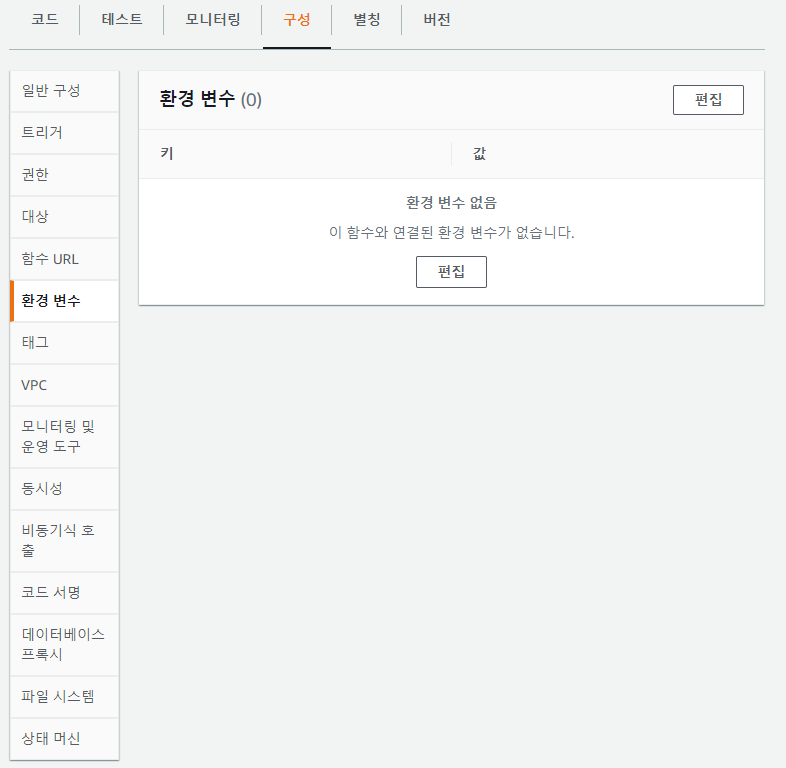
구성 - 환경 변수 탭으로 이동하고 편집을 클릭합니다.
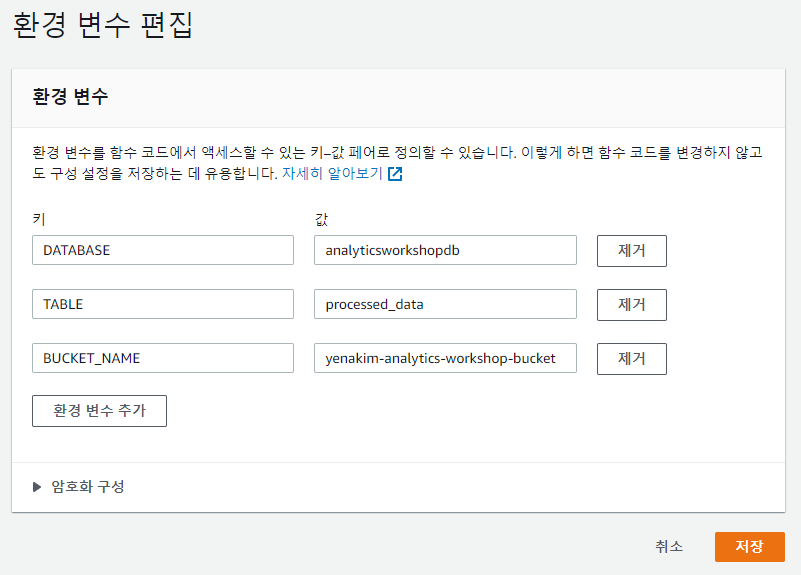
위와 같이 다음 세 개의 환경변수를 만든 후 저장을 누릅니다.
Key: DATABASE, Value: analyticsworkshopdb
Key: TABLE, Value: processed_data
Key: BUCKET_NAME, Value: yourname-analytics-workshop-bucket
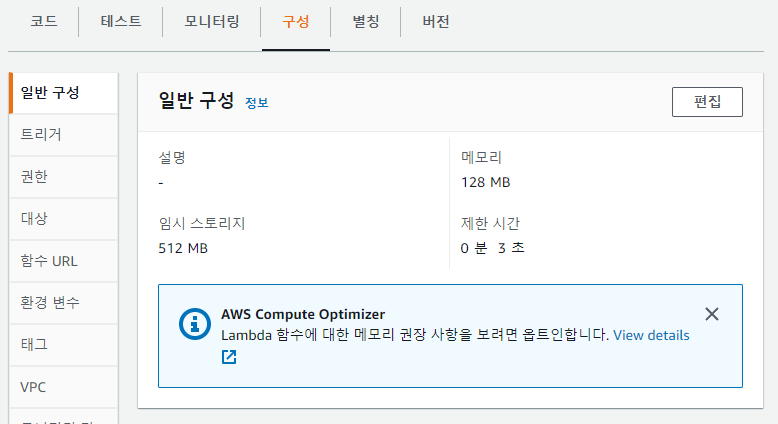
구성 - 일반 구성으로 이동합니다.
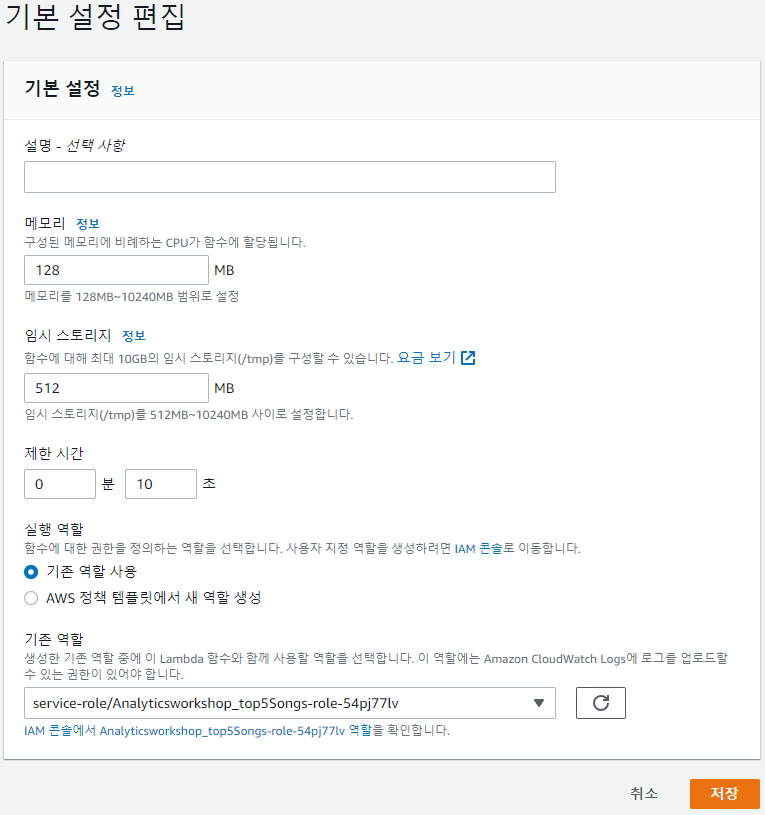
제한 시간을 10초로 변경한 뒤 저장을 누릅니다.
4. Execution Role
구성 - 권한으로 이동합니다.
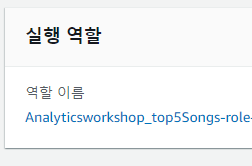
실행 역할 아래의 파란 글씨를 눌러 IAM 콘솔탭을 엽니다.

권한 추가 - 정책 연결을 눌러 AmazonS3FullAccess와 AmazonAthenaFullAccess를 추가합니다. 모두 추가했다면 IAM 콘솔탭을 닫습니다.
5. 테스트 이벤트 구성
함수 코드 섹선에서 Deploy를 눌러 함수를 배포합니다.
이제 새로 생성된 람다 함수의 실행 결과를 확인하기 위해 Dummy 테스트 이벤트를 구성해 보겠습니다.
Test를 클릭합니다.
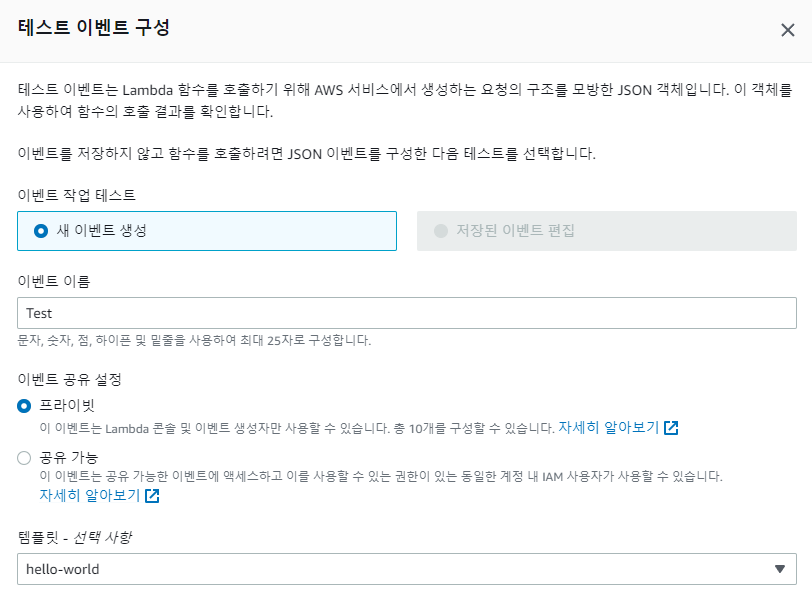
이벤트 이름을 Test로 설정하고 나머지는 그대로 둔 뒤 저장을 누릅니다. 이제 다시 Test를 클릭해 봅시다. Execution Result 섹션에서 json 형식의 출력을 볼 수 있습니다.

길어서 잘렸지만 이런 형태입니다.
6. Athena를 통한 확인
Athena 콘솔 https://us-east-1.console.aws.amazon.com/athena/home?region=us-east-1#/query로 이동합니다.
1
2
3
4
5
6
7
SELECT track_name as "Track Name",
    artist_name as "Artist Name",
    count(1) as "Hits"
FROM analyticsworkshopdb.processed_data
GROUP BY 1,2
ORDER BY 3 DESC
LIMIT 5;
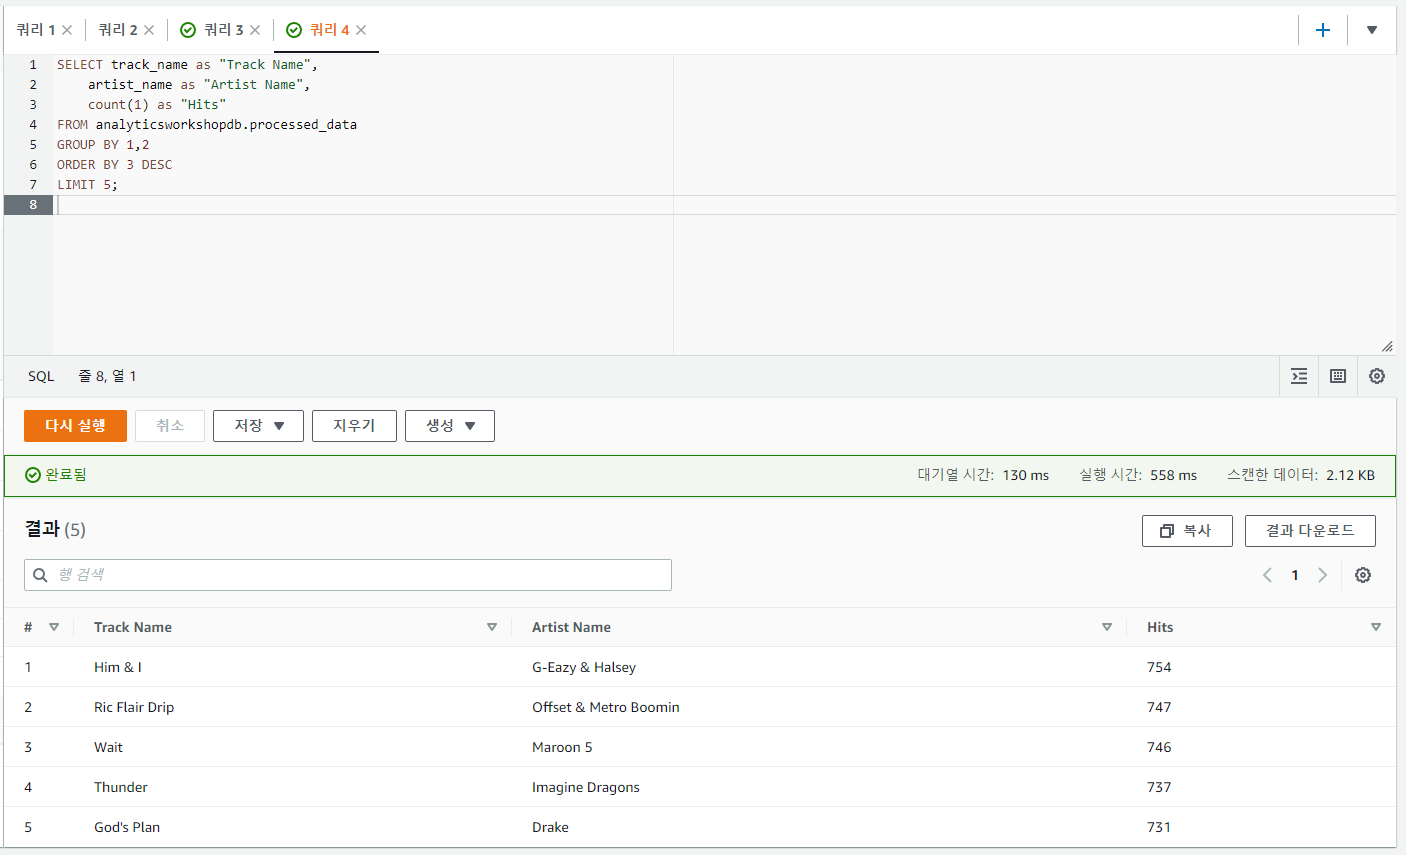
Database는 analyticsworkshopdb를 택하고 위 코드를 넣은 쿼리를 실행하면 위와 같은 결과를 얻을 수 있습니다. 위에서 Him & I가 1등이었는데 같은 결과가 나왔습니다. 위에는 잘려있지만 나머지 부분도 같음을 확인하였습니다.